Last Updated on October 31, 2020 by Ted Mosby
Having a travel trailer means you have a portable home that you can bring along wherever you go. However, unlike a home, you have to level a travel trailer to keep it stable and yourself comfortable. Comfort aside, making sure that your travel trailer is level is also necessary to keep appliances function properly.
So, How to Level a Travel Trailer?
When leveling a travel trailer, it is not an arduous task if you have parked the camper on a leveled ground and have the necessary supplies, such as wood scraps and leveling blocks. Once you have leveled the trailer from side to side, it will be easy to level it from the front and back by adjusting the tongue jack.
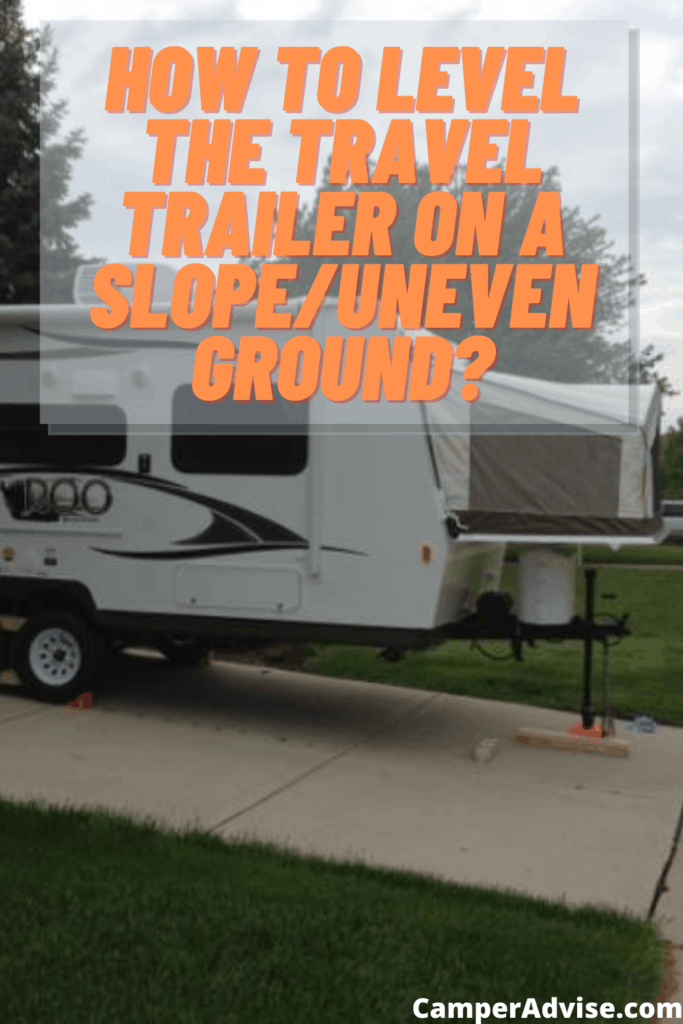
But, what if the ground you have parked your camper on is uneven? How to level a travel trailer on a slope? That is the question I’m going to discuss below.
So, let’s get started!
How to Level a Travel Trailer on a Slope or Uneven Ground?
When leveling a travel trailer, you should know that, from side to side, start to level the trailer. After that, chock the wheels and start leveling your trailer’s front and back by adjusting the tongue jack. Once you are done doing that, the trailer will be more stable, more comfortable, and the appliances like the refrigerator will work properly.
However, the things you will need to level a trailer on a slope include,
- Wheel Chocks.
- Leveling Blocks (plastic or wood).
- Two-Foot Level.
How to Level the Travel Trailer on an Uneven Ground from Side to Side?
1. Find the Flattest Place to Park Travel Trailer
The primary and most important step is to find the flattest place where you can park your travel trailer. Once you have found such an area, make sure to clean it from debris, such as rocks, to avoid their interference when you are trying to level the trailer.
The flattest place where you can comfortably park your RV will minimize the slope amount to make it easier for you to level a travel trailer. Moreover, try your best to park your travel in such a position that slope runs from front to back rather than parking it side to side. Once you have parked your travel trailer in the best possible position, you are all set to begin the process to level the trailer.

Camping Gear SALE!
We have teamed up with Ape Survival to give you a huge 25% off EVERYTHING on their store! They have camping gear, hiking gear, survival gear and much more, all at 25% off when you click the link below.
SHOP NOW2. Use Bubble Leveler Tool
[amazon box=B003YJNN2G]
In this regard, having a leveler is what you need. It will tell you how much you have to raise your travel trailer’s low side to level it. Moreover, having a bubble level is another inexpensive tool to have to level the trailer.
Using a leveler sometimes confuses the people. You should lay it from left to right of your travel trailer’s rear bumper. Keep looking at the bubble in the middle. It will float to the side, which is higher than the other side. Now, once you have figured out the lower side (opposite of the level bubble), start raising it.
Note: Before you start leveling a travel trailer on a slope or uneven ground, make sure to keep it hitched until the completion of the process (side to side leveling).
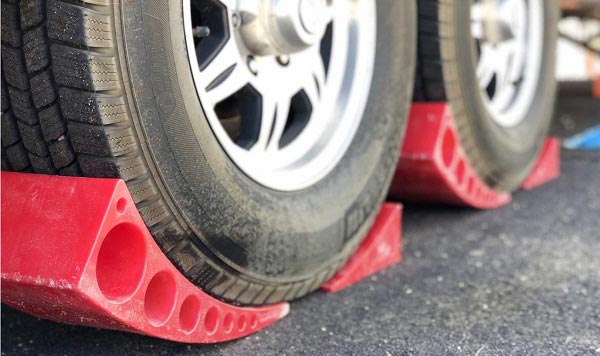
3. Plastic Leveling Blocks
[amazon box=B0028PJ10K]
Once you have got the idea of how many leveling blocks you will need to place to level your travel trailer on a slope, It’s time to start placing them in front of the trailer’s tires. In this regard, something durable and strong like plastic leveling blocks is great to use.
Now, you are required to snap them together to create a ramp and then place them in front of the wheels to the side you want to raise. Moreover, if you have a travel trailer with dual wheels, you will be required to place leveling blocks in front of both of its tires.
DIY Wood Leveling Blocks
If you don’t have plastic leveling blocks or don’t want to buy them for whatever the reason is, you can use DIY wood leveling blocks. However, make sure the wood leveling blocks you are going to use should be wider than your trailer tires. Moreover, I suggest using plastic leveling blocks instead of wood blocks because they are lighter than woodblocks and more durable and strong.
Furthermore, woodblocks might slide out of place when you are driving the camper on them. Needless to say that you should never use the wood blocks if their wood is broken or rotten.
4. Drive the Travel Trailer on Leveling Blocks
The fourth step to level a travel trailer on a slop after you have placed the leveling blocks is driving your camper on them. Carefully drive your trailer forward on the leveling blocks. Having someone outside the camper who can guide you will help you stop the camper from the top of the leveling blocks. Make sure to place the trailer tires on top of the blocks.
If your trailer’s tires are not centered on the blocks, you have to repeat the process again until you get them situated on the leveling blocks properly. However, if you have perfectly placed the tires on the leveling blocks but the trailer is still not leveled, drive back your travel trailer off the blocks to add more of them.
5. Place the Wheel Chocks
Once the travel trailer is perfectly leveled, the next step is placing the wheel chocks on the tires on both sides of your travel trailer. In this regard, you will need to place the chock under each trailer wheel to wedge them in place manually. Make sure to place the chocks under the downhill side of the tires.
Camping Gear SALE!
We have teamed up with Ape Survival to give you a huge 25% off EVERYTHING on their store! They have camping gear, hiking gear, survival gear and much more, all at 25% off when you click the link below.
SHOP NOW[amazon box=B01CGU14T2]
They are essential to hold the travel trailer. However, not all RVers use them. That is why they complain about a rocking camper when someone walks inside the trailer, which could also cause the trailer to leave its place. That is why using the wheel chocks is essential to keep the trailer still.
How to Leveling the Travel Trailer from Front End to Back End
Now, let’s discuss how to level and stabilize a travel trailer from front to back.
1. Place Wooden Blocks under the Tongue Jack
The tongue jack of a travel trailer acts as a connection to link the trailer to your tow vehicle. You can use wood blocks under the tongue jack to provide it a place to rest. It will make sure that your travel trailer stays still when in use. Moreover, you can also buy a wheel dock that is easily available in RV supply stores.
2. Unhitch the Travel Trailer
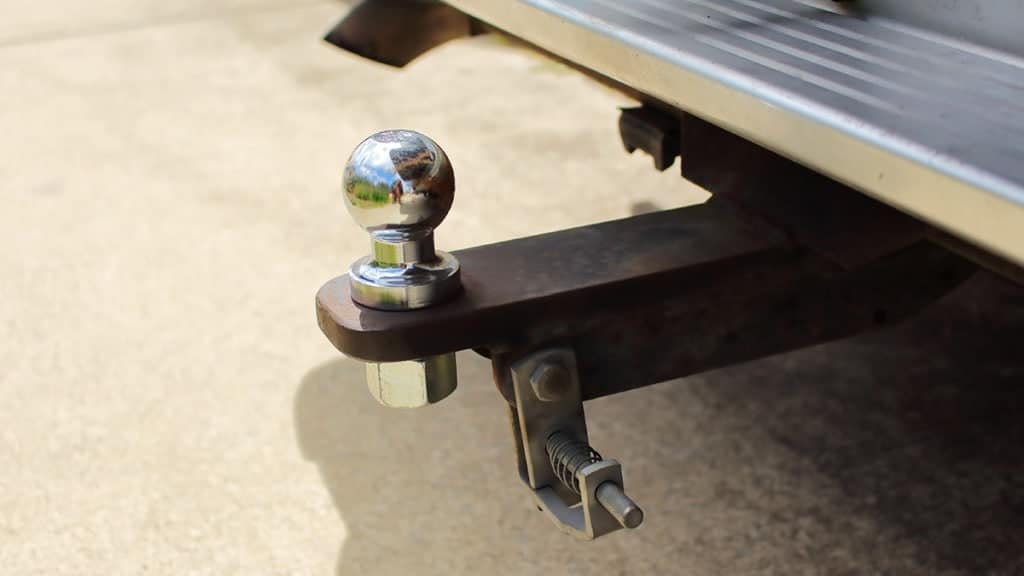
Once you have provided a place for the tongue jack to rest, unhitch the trailer from your tow vehicle. Place the jack’s metal shaft on the wood and move your vehicle out to complete the stabilizing and leveling process.
3. Measure the Levelness of the Travel Trailer
Again, you have to use the bubble level tool—this time, you have to place it in the travel trailer door. Make sure to lay it facing the front and back end of the trailer. If the leveler’s bubble is indicating a side is lower than the other one, you are required to it adjust the travel trailer again.
4. Lower the Travel Trailer by Adjusting the Tongue Jack
You will need to look at the owner’s manual to know how to adjust your travel trailer’s tongue jack. Most tongue jacks come with a crank that can be adjusted by hands to lower or raise the tongue jack’s metal shaft. Keep repeating it until the trailer’s front, and back ends get leveled.
5. Place Wood Scraps Beneath the Stabilizing Jacks
Stabilizing jacks can be found on each corner of the travel trailer. They are not for leveling the travel trailer but stabilizing it, which helps to stop your travel trailer from shaking its hips. Place the wood blocks under the stabilizer on each side to ensure they stay still.
But what if, by any chance, your travel trailer doesn’t have any stabilizers? Well, in that case, you can install them permanently or get a jack stand from any automotive store.
6. Lower the Jack
Finally, now it’s time to lower the jacks onto the woodblock. Again, read the owner manual of your travel trailer to know how to adjust the trailer’s stabilizing jacks. Bring them down to place them on the woodblock.
Wrapping Up
How to level a travel trailer on a slope or uneven ground? I have answered this question comprehensively. I have simplified each and every step related to leveling the travel trailer. It is a simple DIY job, and you don’t have to get help from a professional. However, if you still need any help, use the comment section below. Happy Traveling
FAQs
Is it possible to level a travel trailer with slides out?
Yes! But it is not recommended. The best way to level a travel trailer is level the trailer first and then slide outs. Trying to level your trailer when the slide outs are extended, it might cause leveling jacks to strain. As a result, it will boost the speed of the wear and tear process. It might also damage the leveling components.
Which leveling blocks should I use to level a travel trailer?
I highly recommend using plastic leveling blocks when leveling a travel trailer. They are durable and stronger than wood leveling blocks. Moreover, wood leveling blocks are also slippery and could leave their place when you drive the camper onto them.
Table of Contents