Last Updated on March 23, 2022 by Ted Mosby
Water is everyone’s basic need, and you cannot live without it. It becomes even essential to have a streamlined water flow when you are traveling with family or camping at your favorite destination.
RVers know how important the water is to keep all the onboard plumbing facilities of their RV smoothly and efficiently.
Your RV water pump is the most important part that makes sure you get fresh water. However, if you haven’t used your RV water pump for a while now, you may run into trouble.
No matter whether you have just got it installed or being stored, it is mandatory to prime the RV water pump before you can use it.
Although to prime the RV water pump process is not that, accessing it could be an issue, and that is why I’ve decided to write a comprehensive post to address things related to the RV water pump.
Below, I’m going to discuss how to prime RV water pump and other relevant issues in an easy-to-understand way.
So, let’s get started!
How to Prime RV Water Pump?
Once you have located the RV water pump, It’s time to prime it.
The items that will be required include,

Camping Gear SALE!
We have teamed up with Ape Survival to give you a huge 25% off EVERYTHING on their store! They have camping gear, hiking gear, survival gear and much more, all at 25% off when you click the link below.
SHOP NOW- Jar.
- Water.
- Flathead Screwdriver.
- Rubber Tubing.
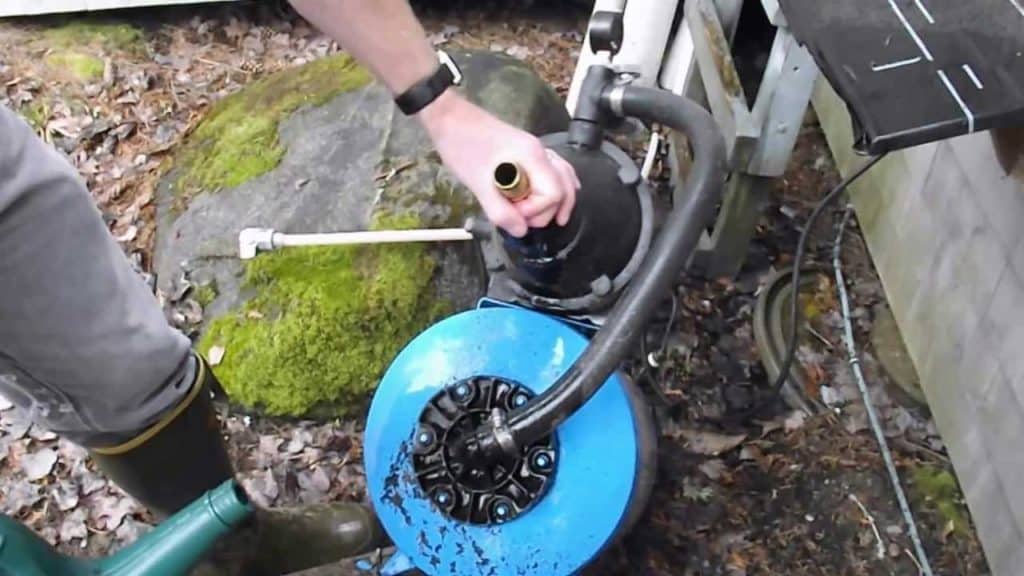
- Step One: Firstly, disconnect the water outlet from the water pump. Use the screwdriver to turn the screws of the pump’s attaching collar. Keep turning the screws counterclockwise until they lose. Now, pull the pump’s freshwater hose. This is because the water usually flows straight into the RV from where it feeds to the toilet, showerheads, and kitchen. These are also essential areas where you need water the most.
- Step Two: Secondly, slip off the collar from the outlet water rubber hose ends. There, you will see an outlet spouting on the RV water pump. Connect the rubber hose to that outlet, and make sure both the waterline and the hose have the same size. Now screw the clampdown to its position
- Step Three: Thirdly, you are going to need at least 12-ounce water ready. You have to make sure that the jar is filled with water. Hold the water hose connected to the water outlet line in the air in such a position that it is higher than the water pump level. Now, you have to fill the connected hose by emptying the water jar.
- Step Four: Fourthly, place your thumb on the hose tip before turning on the water pump. Wait until enough pressure builds up in the hose. Once you feel that the water is touching your thumb, turn off the water pump.
- Step Five: The last step is to take the hose out from the outlet before you reconnect the water outlet line. Now, turn on one of the faucets installed in your RV and turn the pump on. Just a few seconds, and you will the water gushing to give the priming RV water pump a finishing touch. Turn off both the water pump and faucets, and there you go.
How Important is It to Prime Your RV Water Pump?
If your RV water pump is turned off for longer periods, it might not produce as much pressure as it should be. However, to get back your RV water pump actual pressure, there is a way that you can use – called priming. It is a process in which you flush back and force water through it when the water pressure is too low.
When considering to prime RV water pump, you may find yourself surrounded by some common questions,
Where is the RV water pump located? What steps should you follow when priming the RV water pump? What are the risks when priming the RV water pump?
When priming your RV water pump, while the rest of the process is a sheer breeze, you will find locating the RV water pump a vigorous task. Once you are done locating it, it means you are halfway through.
But why is it so important to the prime RV water pump?
The biggest reason that force you to prime your RV water pump is that when you are camping off-grid or deep inside the woods, your life depends entirely on water.
Generally, RV tanks can store anywhere between 40 to 150 gallons of water, varying speeds of dispensing water between 3.5 to 5.3 per minute.
However, it’s your water consumption requirements that determine the RV water tank and water speed. If you are a couple, a smaller water tank would be enough, but if you also have two kids with you, a bigger RV tank would be best.
How to Locate RV Water Pump?
Again, the most arduous task you will encounter when a priming RV water pump is finding the water pump. The reason for this is it is generally located underneath the bench seats or inside the cabinets since they are the closest locations close to the RV storage tanks.
However, if you are having trouble finding the RV water pump, you may also want to refer to your manual if you have one. Moreover, if you still cannot find it, you should look line right from the cabinet underneath the kitchen sink.
Camping Gear SALE!
We have teamed up with Ape Survival to give you a huge 25% off EVERYTHING on their store! They have camping gear, hiking gear, survival gear and much more, all at 25% off when you click the link below.
SHOP NOWHowever, if you are not confident DIY, I recommend consulting a professional.
Tips for RV Water Pump Priming
Before you get into the priming RV pump business, there are some tips that you should arm yourself with to make the entire process efficient and smooth.
Here they are,
- Use a hose that is specifically made for storing water. If you are going to hook up the unit that supplies fresh water to your RV, then I strongly recommend this. Do not use the hose for purposes other than storing water, or else it will lose its cleanliness.
- Locate your RV water pump and determine a way that allows you to access it with ease. Save your time when locating it by starting your search right from the kitchen sink. Moreover, disconnect the water outlet before you start the priming process.
- Reduce the risk of air trapping in the line by pouring a gallon of water into it. If it is trapped with air buildup, it will reduce the pressure buildup when priming.
- Know how much water is stored in your RV water storage tank. You may find yourself drying with no freshwater in the tank when camping. You should consider weight to determine the quantity of water (One gallon = 8 lbs).
Troubleshooting RV Water System
No matter whether you are new in RVing or a professional, chances are you already know how hard it is to troubleshoot RV issues. RVs are big, complicated, but they are still loved by all of the use; after all, they are our second home on wheels.
Having to deal with RV maintenance issues that cannot be fixed by DIY, you have to consult a professional, which we all want to avoid as much as possible because the bills from these RV professionals are a real pain.
However, using DIY techniques for maintenance, repairs, and troubleshooting means you can save yourself a lot of money that can be used, boosting your travel budget to enjoy more adventures for extended periods.
In addition to RV troubleshooting and maintenance, many of them are DIYs, even if you are not a mechanical geek when it comes to the RV water system. Here are some of them.
Things Aren’t Working After Winterising the RV Water Pump
It is a common and terrible inconvenience when you are all set to get out to go on an adventure. If your RV water pump is not working after you have winterized it, ask yourself,
- Did I leave the drain open when filling up the freshwater tank?
- Did I reconnect everything correctly after pumping RV antifreeze through water lines?
- Are the shut-off valves still open?
- Can you hear the pump sound? No? have you checked the electricity, whether it is there or not?
- Did you check whether the pump is grounded?
If you have checked everything that I have mentioned and found no issue, you may have to replace the entire RV pump system.
Why is My RV Pump Making So Much Noise While Also Rattling the Pipes?
If your RV water pump is producing so much noise, it could be due to the installation or design. RV companies don’t waste much of their time and try to place all the RV parks in their respective places.
In this regard, if your RV water pump is loose, it will produce more noise and vibration.
Follow the steps,
- Locate and turn off the water pump. It could be anywhere, under the kitchen sink, beneath the bed, or under the rig.
- Turn off the RV pump.
- Unscrew the RV pump to remove it safely. Then place a rubber padding or something similar under the pump. Screw the pump back on. I hope now you will not hear or feel much noise and vibration.
- Wrap the water pipes using foam insulation and ducting tape. Moreover, ensure that insulation is half-inch thick to eliminate the clanging sounds.
- If pumps keep turning on and off rapidly, it will cause more noise and vibration. You just have to adjust the water pump properly to fix the issue.
How to Repair RV Water Pump Leakage?
RV water pumps and faucets are intended to turn on each time you flush or turn on the faucet. After you are done, turn off the water, but the pump keeps running; it means your RV pump has leakage issues.
Your very first intention should be locating a broken valve that is intended to let your pump know when to stop. If the valve is cracked, it will not help your RV pump to stop pumping.
In this regard, try,
- Turn the water off and take off the current valve. It can be located on a hose or tube connecting the RV water pump to a freshwater tank.
- Place a new valve on the line and make sure the arrow direction is right at the freshwater tank.
- Connect the other end of the valve to the water pump while also making sure the fitting is good.
- Check the water pump again.
If the above steps don’t help, you have to check all the water lines. If any of the water lines are damaged, it will reduce the water pressure while also allowing the water pump to keep running.
Repairing a damaged or cracked waterline means you have to refer to your RV owner’s manual or YouTube.
Final Words
DIY RV troubleshoots, repairs, and maintenance is a great way to save yourself some money. However, if you are not confident troubleshooting your RV issues or maintenance, you should avoid DIY and consult a professional to eliminate the risk of more damage.
However, the priming RV water pump is a relatively easy process that you should DIY, rather than hiring a professional.
In this regard, you can refer to the guide I have mentioned in this post. I sincerely believe that the post will help you to be prime the RV water pump without any problem.
FAQ
Some common indications of a damaged or cracked RV water pump include Engine overheating, steam from the radiator, water pump producing too much noise, low water pressure, and coolant leakage.What are the indications of a damaged or cracked RV water pump?
You should pour water inside the water lines while the faucet is open to get rid of air buildup.What is the easiest way to get rid of air buildup in water lines?
Table of Contents