Last Updated on October 27, 2020 by Ted Mosby
Since winters are gone, and summer is just around the corner, RVers are looking for help to de-winterize their recreational vehicles. So, I’ve decided to share a detailed post to make things simpler for you. This post will outline everything related to de-winterizing an RV camper that will help.
For people living in the regions where the temperature is extremely cold, it is vital for them to winterize their recreational vehicles. Winterizing your RV means you are enabling it to withstand bitter cold conditions. However, once the winter season has gone, it is equally important to de-winterize your RV camper to keep its optimal condition.
It is essential to thoroughly check the entire camper to make sure its proper condition and functionality. Although the process of de-winterizing an RV camper involves a lot of steps, it is easy to do it yourself. Below, I will discuss everything step-by-step to make it hassle-free.
So, let’s get started!
How to De-Winterize an RV Camper?
1. Exterior of the Travel Trailer
The very first place to consider when de-winterizing an RV is the exterior of the camper. You should inspect it to get started with the process. In this regard, the things that should be done include,
Check the Tires
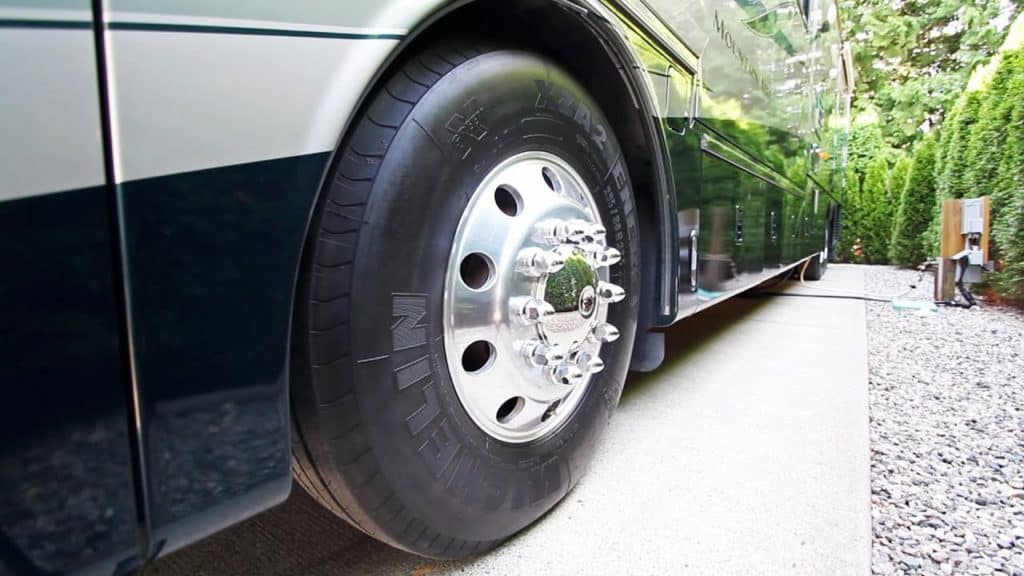
When you store your RV for extended periods, the trailer’s tires start losing air pressure. Especially if you have stored the RV at a place where the temperature is cold, there’s a high chance that the tires will deflate more quickly. You don’t want to drive your camper when its tires are under-inflated because it can cause poor handling, eventually leading to an accident.
So, it is critical to check your RV tires when considering de-winterizing it. In this regard, having a tire pressure gauge is a useful tool. Inspect the air pressure in all four tires of your RV, including the spare one, if you have it. Make sure the tires are matching the recommendations of the manufacturer.
[amazon box=B01J8DLGU2]
Moreover, when inspecting RV tires, you should also consider checking wear signs, cracks, and worn down threads.
Check the Exterior
Before moving into a more in-depth process while considering to de-winterize the RV, inspect the exterior of the RV to determine if there are any cracks, damages, or leakages. You should also inspect the windows and doors to determine if there is any cracked or peeling sealant. Take a look at slide-outs, roof, and the entire RV to place new seals if required.

Camping Gear SALE!
We have teamed up with Ape Survival to give you a huge 25% off EVERYTHING on their store! They have camping gear, hiking gear, survival gear and much more, all at 25% off when you click the link below.
SHOP NOWIf your RV was stored outdoor for a long time, pay attention to any water damage, especially to the RV roof. It is because heavy snow accumulation can cause structural damage or crack the seams. For towable campers, consider taking a look at the hitch components to remove any rust. If you found any damaged part, replace it straight away to prevent getting stuck on the road or an accident.
2. Reinstall the Batteries
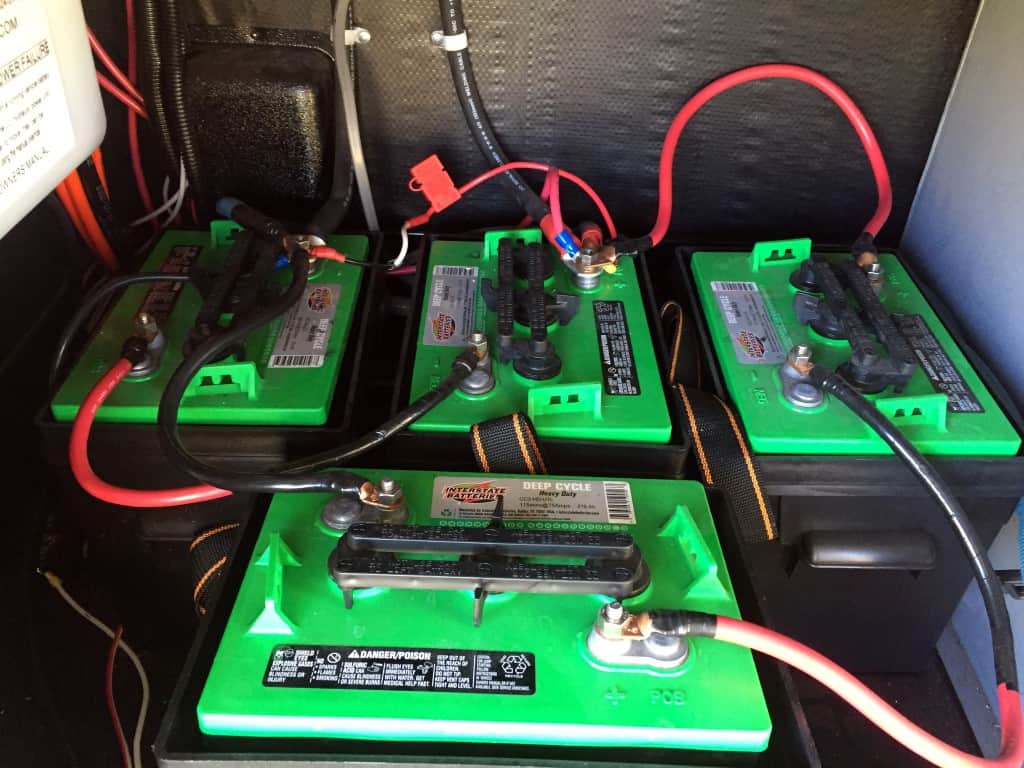
RV batteries are similar to RV tires in terms of losing charge when stored for a longer period without charging. It would be great to keep inspecting your RV batteries periodically and recharge them when necessary, especially during the off-season. Keeping your RV batteries charged also means you can enhance their efficiency while also extending their lifespan.
An RV voltmeter is a handy tool to have for checking batteries charge level. However, while inspecting the batteries, make sure they are in off position and not connected to electricity. This will also give you an accurate reading. If you get a reading of 12.7 volts, it means your 12V battery is fully charged. But, if the reading is just 12 volts, you should charge it before taking your RV out on the road.
[amazon box=B07FGFFHC6]
Before charging your RV batteries, make sure to turn off the charger while attaching the charger to the RV charger. Once connected, turn on the charger and give the batteries enough time to charge completely. If you have a big-size battery, they might take a longer time to charge.
Moreover, once the batteries are fully charged, you should also check the batteries’ water level. If the water level is low, add distilled water. Once all done, you have to place the batteries back into the RV. If you are not confident placing the batteries properly, consult a professional who can properly place them back in for you.
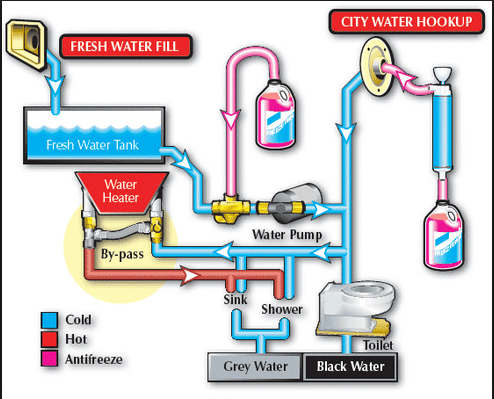
3. Flush RV Water System
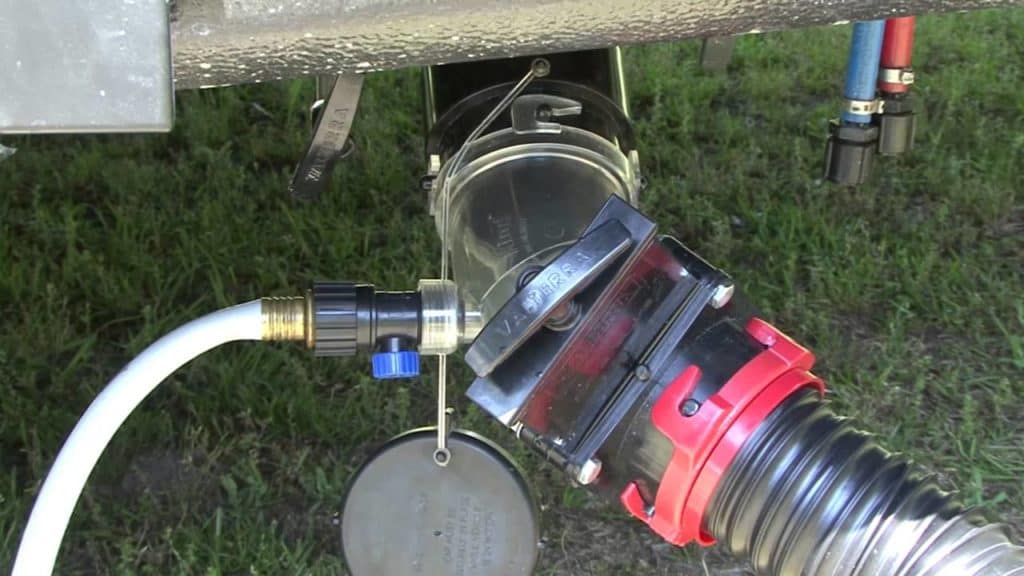
While considering to de-winterize an RV, preparing the water system of the RV is probably the most crucial part. When on the road, you rely on the clean water source to get consumable water for cooking, washing dishes, drinking, and showering. But when you winterize the RV water system, you use non-toxic antifreeze to protect the water system from freezing.
[amazon box=B00NKV0QM8]
So, when de-winterizing the RV, you have to flush out the entire plumbing system to get clean and consumable water. If you have added the antifreeze directly into your RV’s water holding tank, you are required to drain the tank first.
Here is how you can drain the tank properly,
- Add potable water into the water holding tank.
- Open all the faucets, including indoor showers, outdoor showers, and sinks.
- Leave the water running through the system for quite some time.
- Flush the toilet several times as well, while the pump is still running.
- When you see the clean water running through the system, close the taps, faucets, and turn off the water pump.
- Take the RV water heater out of bypass mode.
- Place new water filter cartridges that you have removed while storing the RV.
- Dump both gray and black water tanks at a dump station.
Once you have flushed the entire plumbing system of your RV, you should now get clean and freshwater. If you feel antifreeze taste in the water, adding baking soda will help to prevent the unpleasant flavor. In this regard, put the baking soda into drains or mix it in water to pour it down each drain. Now, start flushing the water again until the antifreeze taste from the water is removed.
4. Sanitize RV Water System
Camping Gear SALE!
We have teamed up with Ape Survival to give you a huge 25% off EVERYTHING on their store! They have camping gear, hiking gear, survival gear and much more, all at 25% off when you click the link below.
SHOP NOWAnother important step when considering to de-winterize the RV is sanitizing the RV water system. Regardless of whether you have used the antifreeze while winterizing the RV or not, sanitizing the water system is important. It will help to remove bacteria or mold caused by storing your RV for an extended period.
Here is how you can sanitize the RV water system,
- Firstly, close the drain and place drain plugs.
- Use one-quarter of household bleach for every 15 gallons.
- Put the bleach into a gallon and fill it with water.
- After mixing bleach and water, pour it into the freshwater tank.
- Now, add water into the fresh water tank until it is full.
- Now turn on the water pump and open the faucets.
- Leave the water running through the system until you feel no bleach smell.
- Drain all the water from the system.
- Again, fill the water holding tank with potable water, turn on the water pump, and flush the system.
- Leave the water running through the system until there is no smell of bleach.
When sanitizing the RV water system, give the bleach enough time to sit in the water lines. It will help to effectively eliminate the bacteria. But also make sure to not leave bleach for too long in the water lines.
5. Check Pipes Leakage
When you are considering de-winterizing the RV for the start of the season, make sure to thoroughly check the RV plumbing system to determine any leakages. Turn on the water pump to pressure the water when the freshwater tank has enough water. The RV water pump will automatically shut off after reaching the maximum pressure.
Wait to see if the water pump turns back on. If it does or doesn’t automatically turn off, it means the water system of your RV has leaks somewhere. Locate the leaks by inspecting the pipes. Also, check the RV toilet to determine if there is any leakage. When found, repair it as soon as possible to prevent any further damage.
6. Check RV Engine
Another important aspect when considering to de-winterize the RV is inspecting the fluid levels of the engine. Makes sure that all the lights and controls are perfectly working. Also, inspect the fluid levels of transmission, power steering, engine oil, engine coolant, brake fluid, etc. If you find any levels lower than it should be, top them before hitting the road.
7. Inspect Safety Components
Inspecting the safety devices present in your recreational vehicle is also worth considering before hitting the road. Make sure they all are in perfect working condition. This includes a carbon monoxide detector, fire and smoke alarm, fire extinguisher, LP detector, etc. Make sure to check your RV fire extinguisher’s expiry date and buy a new one if needed.
8. Inspect Windows and Air Vents
During the RV spring maintenance, make sure to open all the vents, windows, and doors of your RV to check whether they are working properly. It will also make sure better air circulation throughout the camper to prevent humidity. It also means that you will get fresh air by having vents and windows in proper working condition.
Tips to Clean your RV in Spring
1. Wash RV Exterior
You can make your RV shine for the entire season by thoroughly washing its exterior. In this regard, use a cleaner by mixing it with water to remove dust and debris. While washing, start at the top of the RV to all the way down.
[amazon box=B0027M3A1U]
2. Clean RV Fans and Air Conditioning Unit
It is essential to clean your RV fans and air conditioning units to keep the fresh air flowing. Make sure to clean your RV fan blades using soapy water. You can also take the fan apart to clean its every component.
3. Vacuum Your RV
Thoroughly vacuuming your RV will help to remove any dust inside and outside the cabinets.
[amazon box=B06ZY896ZM]
4. Check for Critters
When you store your RV for longer periods, bugs, spiders, and mice found their way into your recreational vehicle, especially during the winter season. Thoroughly inspect all the nooks and crannies, including refrigerator drawer, water heater, and cabinets.
5. Wash Windows and Screens
Use soapy water to clean your RV windows and screen. Make sure to air dry them or use a towel. You can use a glass cleaner to keep them clean as well.
[amazon box = B00E0NSL54]
Wrapping Up
That is all. That’s how you can de-winterize an RV camper to prepare it for your next adventure. If you’re new to RVing and have never de-winterized an RV before, the above guide will help you. I’ve outlined all the steps that you need to go through to de-winterize an RV. If you need any further assistance, post a comment below.
FAQs
Do I have to call a professional to de-winterize my RV?
No! De-winterizing your RV camper is not an arduous task, and you can do it by yourself. However, it is a time-consuming process, and you have to devote an entire afternoon.
Is it necessary to clean your RV while de-winterizing it?
Yes! Keeping your RV clean when de-winterizing it is necessary and will help you keep it optimal. This includes cleaning your RV appliances, cabinets, windows, screens, etc.
Table of Contents